I’ve done some research on a few mushrooms and whether or not you can grow them on straw (like shiitake) but wanted to find out if I could grow lion’s mane on straw specifically. So, I did some more research. Here’s what I found.
Lion’s Mane grows on different types of straw such as wheat and oat and typically takes 4-6 weeks. Straw is an affordable and sustainable option. However, growing Lion’s Mane on straw typically results in 2-3 flushes, while other substrates like hardwood sawdust may provide more flushes and a longer growing period.
Now, let’s see how we can grow them on straw!
How to Grow Lion’s Mane on Straw (6 Steps)

2 Best Types of Straw For Growing Lion’s Mane
- Wheat Straw: Wheat straw is the most widely used and recommended straw for growing Lion’s Mane. It offers an excellent balance of nutrients, structure, and affordability. Its fibrous structure provides surface area for the mycelium to colonize and good aeration for healthy growth.
- Oat Straw: Oat straw is another suitable option for growing Lion’s Mane. It is similar to wheat straw in terms of structure and nutrient content. Oat straw may be slightly more expensive or harder to find compared to wheat straw, but it can still yield successful results.
How Long Will It Take?
Growing Lion’s Mane on straw typically takes between 4 to 6 weeks from start to finish. You’ll spend the first 1 to 2 weeks preparing the straw, inoculating it with spawn, and letting the mycelium colonize. After that, you’ll have another 2 to 4 weeks of fruiting, where the actual mushrooms grow.
What Supplies Are Needed?
Before we get started, make sure you’ve got all the necessary supplies:
- Straw (preferably wheat or oat) – Enough to fill your chosen container.
- Lion’s Mane mushroom spawn – You can buy this online or make your own.
- A large container – I prefer buckets.
- Hydrated lime (optional) – To adjust the pH of the straw.
- A large pot or container – To pasteurize the straw.
- Water
- Thermometer – To monitor the temperature during pasteurization.
- Tongs or gloves – To handle the hot straw.
- A clean and sterile workspace.
Now that you’ve got all your supplies, let’s dive into the process:
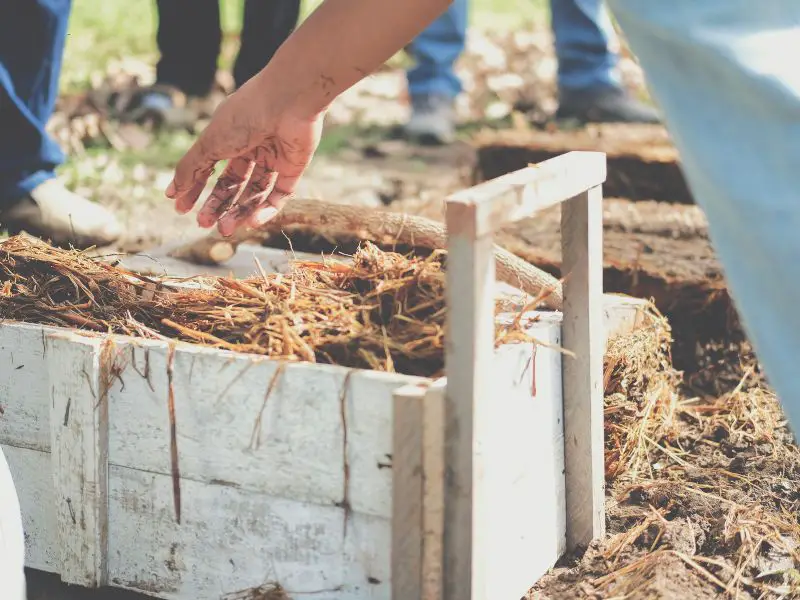
Step 1: Prepare the Straw
Chop your straw into smaller pieces (1-2 inches long) to provide more surface area for the mycelium to colonize. Next, you’ll need to pasteurize the straw to kill off any unwanted organisms.
Fill a large container with water, heat it to around 160-170°F (71-77°C), and maintain this temperature for 1 hour. Add the straw and weigh it down, so it’s completely submerged.
When it comes to containers, both buckets and bags can work well. Buckets offer a more rigid structure, making it easier to manage, while bags take up less space and can be more flexible. In either case, make sure there’s adequate airflow for the mycelium to breathe.
You can add hydrated lime to the water to raise the pH, which can help with contamination prevention.
Step 2: Cool and Drain the Straw
After pasteurization, use tongs or gloves to remove the straw and let it cool down to room temperature. Be sure to drain any excess water, as overly wet straw can lead to contamination.
Step 3: Inoculate the Straw
In a clean workspace, mix your Lion’s Mane spawn evenly into the straw. Fill your chosen container with the spawn-straw mixture, packing it down firmly but not too tight. You want to leave some air pockets for the mycelium to breathe.
Step 4: Colonize
Cover your container with a breathable material like a piece of cloth or a plastic bag with holes. Store it in a dark place with a temperature of around 65-75°F (18-24°C).
After 1 to 2 weeks, you should see white mycelium covering the straw. Once fully colonized, it’s time for fruiting.
Step 5: Fruiting
Move your container to a well-ventilated area with a slightly lower temperature of 60-70°F (15-21°C) and indirect natural light. High humidity (90-95%) is essential for fruiting, so you can mist your mushrooms daily or use a humidifier.
Step 6: Harvest and Flush
Lion’s Mane will take 2 to 4 weeks to fruit, depending on the conditions. Once the mushrooms reach their desired size, you can harvest them by gently twisting them off or cutting them at the base.
After harvesting, you can “flush” your mushrooms to encourage further growth. Wait for the mycelium to recover for about a week, then start misting again to trigger another fruiting cycle. You can usually get 2-3 flushes out of your straw.
Pros and Cons of Growing Lion’s Mane on Straw
Pros
- Low-cost: Straw is a readily available and inexpensive substrate for growing mushrooms. This makes it an appealing option for those looking to cultivate Lion’s Mane without breaking the bank.
- Sustainability: Straw is a renewable resource, and using it as a substrate for mushroom cultivation helps reduce waste, making it an eco-friendly choice.
- Easy to source: Straw can be easily found at local farms, garden centers, or feed stores, making it convenient to acquire.
- Simple preparation: Preparing straw for mushroom cultivation is relatively straightforward, as it only requires chopping, pasteurization, and cooling before inoculation.
- Good yields: With proper care and maintenance, growing Lion’s Mane on straw can result in substantial yields.
Cons
- Less nutrient-dense than other substrates: While straw works well for growing Lion’s Mane, it’s not as nutrient-dense as hardwood sawdust or a mixture of hardwood sawdust and bran, which can yield better results.
- Contamination risk: Straw can be more susceptible to contamination if not adequately pasteurized or if the growing environment isn’t clean. This can lead to a lower success rate compared to other substrates.
- Limited flushes: Growing Lion’s Mane on straw typically results in 2-3 flushes, while other substrates like hardwood sawdust may provide more flushes and a longer growing period.
- Requires pasteurization: Straw must be pasteurized to kill off unwanted organisms, adding an extra step to the process. In comparison, some other substrates like hardwood fuel pellets don’t require pasteurization.
Best Overall Material to Grow Lion’s Mane On
While straw is a great option, hardwood sawdust or hardwood fuel pellets are considered the best overall material for growing Lion’s Mane.
They provide a more natural habitat for the fungus, which naturally grows on hardwood trees in the wild. Using a mixture of hardwood sawdust and wheat bran can further improve your yield.
Can You Use Coffee Grounds as a Supplement?

Coffee grounds can be used as a supplement for mushroom cultivation, including Lion’s Mane. They are an abundant and sustainable resource that can be obtained for free or at a low cost.
Used coffee grounds provide several benefits when used in conjunction with straw or other substrates, such as being nutrient-rich, eco-friendly, widely available, and improving substrate texture.
Coffee grounds are rich in nitrogen, which is beneficial for mycelium growth. Adding coffee grounds to your straw or other substrates can improve the nutrient content, potentially leading to better growth and higher yields.
Mixing coffee grounds with straw or other substrates can improve the texture, making it easier for the mycelium to colonize.
To use coffee grounds as a supplement for growing Lion’s Mane, you should first collect used coffee grounds and allow them to dry to prevent mold growth.
Then, sterilize the coffee grounds by pasteurizing them at 160-180°F (70-82°C) for 1-2 hours. After cooling, mix the coffee grounds with your chosen substrate, such as straw or hardwood sawdust, at a ratio of around 10-20% coffee grounds by volume.
Finally, inoculate the mixture with Lion’s Mane spawn and proceed with the usual cultivation steps.
It’s important to note that using coffee grounds as a supplement may increase the risk of contamination if not properly sterilized, so it’s crucial to ensure they are adequately pasteurized before mixing with your substrate.