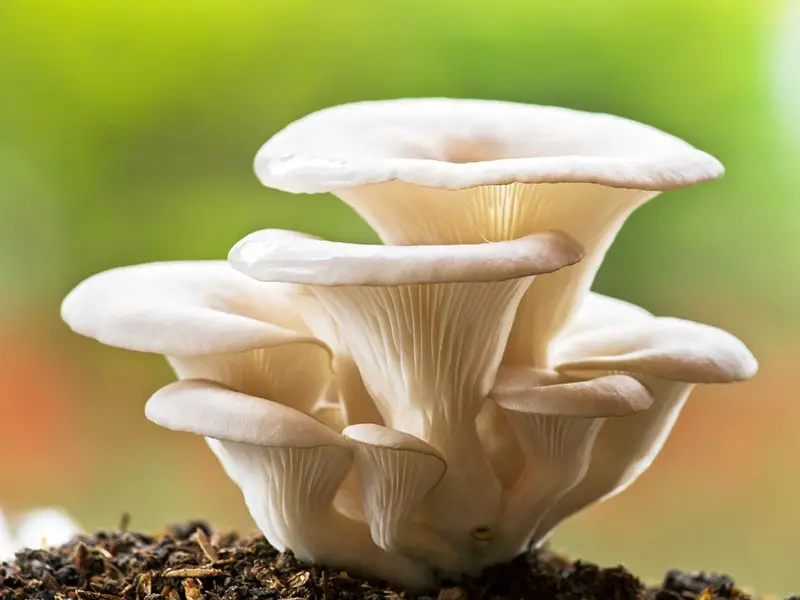
I’ve been growing different varieties of mushrooms in different mediums, but one that I haven’t tested yet is growing oyster mushrooms in coffee grounds. I did some research and was surprised at what I discovered.
Oyster mushrooms grow well in coffee grounds, and it’s actually one of the preferred substrates. Oyster mushrooms are so versatile that they will consume many different kinds of substrates including sawdust, which is a large reason why they are one of the most common to be cultivated.
While my question was answered, I still wanted to find out more details including how to grow oyster mushrooms on coffee grounds and which substrate is the best. Let’s take a closer look.

Do Oyster mushrooms prefer to grow on coffee grounds?
Oyster mushrooms are one of the best mushrooms to grow on coffee grounds due to the small size of the grounds. The caffeine within the coffee grounds can sometimes inhibit mycelial growth, but it’s not common for oyster mushrooms.
Looking for an easy way to grow mushrooms at home? Check out these fun grow kits on Amazon.
Additionally, some issues arise when the grounds are too fine. Smaller particles compact easily, making it difficult for anything to squeeze in between them, even water. This can cause some issues such as the oyster mushrooms turning yellow.
Depending on the grinding method, coffee grounds can range from coarse to finely ground. Coffee that’s ground too fine may present issues. We’ll cover that more in detail later but first, let’s explore the benefits of using coffee grounds to grow oyster mushrooms.
What are the benefits of using coffee grounds versus other materials?
Pre-pasteurized
There are millions of bacteria and other fungal spores just waiting for the opportunity to compete with your mushrooms. It is because of these pesky organisms that substrates, such as straw, must be pasteurized before using to grow mushrooms. Pasteurizing simply means heat-treating the substrate until we are sure most of the contaminants are dead.
What is great about coffee grounds is that they have already been heat-treated by the coffee brewer. You will still want to take measures to use the grounds quickly and be as sterile as possible during the process.
Eco-friendly
Did you know that some fertilizers, such as phosphorus, are non-renewable? In the case of phosphorus, we mine the element from the earth and use it in fertilizer. This is one reason why recycling nutrients is so important. When you use coffee grounds, not only are you freeing up landfills, you are recycling precious nutrients that the coffee plant drew from the soil.
Go one step further by using the remnants of your substrate to fertilize your garden. Not only are you providing some easily digestible nutrients for your plants, but you may have surprise oyster mushrooms pop up from the ground to thank you!
Used Coffee Grounds are Free!
One thing that most people can agree on is that there isn’t a price better than free. Reducing the costs of production can make the fruits (or mushrooms) of your labor taste even sweeter. You can also ask your local coffee brewery for their extra coffee grounds since they are likely to be thrown out anyway.
How to prepare the coffee grounds to grow Oyster mushrooms
There are two ways to use coffee as a substrate to grow oyster mushrooms. You can either use it in its pure form or as a mix. There can be various kinds of mixes and pairings but for now, we will discuss only two of them. When you start to feel more comfortable go ahead and experiment more! There is nothing wrong with a little experimentation.
Choosing a substrate mix
Pure coffee grounds: If you would like, you could try to use just pure coffee grounds. The composition should be 90% coffee to 10% mushroom spawn. The pro to this is that it is a lot simpler than trying to mix multiple substrates together and getting multiple measurements right.
However, as we stated earlier, pure coffee grounds can become pretty dense since it tends to be compact. The smaller particles like to stick to each other. What that means is that you should only use 1 kilo (2.2 pounds) when using just coffee grounds, or else it will be too heavy to stay fluffy enough for the mycelium.
When the substrate is too dense, colonization of the mycelium slows and enables other foreign bacteria or fungi to steal your coffee grounds.
Coffee grounds/wheat straw mix: To help mitigate the poor airflow of pure, compacted coffee grounds, you can use coffee grounds mixed with a small portion of wheat straw. The wheat straw should be chopped up to about 2-3 inches. This mixture creates larger air pockets in the substrate, helping the mycelium to ‘breathe’. The composition should be about 70% coffee grounds, 20% straw, and 10% mushroom spawn.
Using this process will speed up colonization, lessening the chance of contamination; something we all want to avoid. The main drawback is that it takes a little more time and preparation to use this mix.
The process
To begin, you will need to gather all of your materials:
- Disposable gloves
- Alcohol swabs
- Substrates (if using straw you will need to sterilize it)
- Mushroom spawn
- Clean air area
- Tote (sterile place to mix the substrate and mushroom spawn)
- Sterile plastic bag (to store mixture)
- Stapler
- Scale
After you have gathered all of your materials, you can start! You are already halfway there. Here is what comes next:
- Create a clean environment. This includes cleaning all of your materials and area with the alcohol swabs and pasteurizing the straw if you have chosen to use the substituted mixture.
- Measure your substrate and mushroom spawn to their proper proportions and then pour them into your tote.
- Mix the materials together with your gloved hands. The more evenly spread the mixture is, the faster colonization will occur. Make sure to try and break up all of the clumps in the mixture.
- You can then start to fill your sterile plastic bags with your mixture. Then roll down the top of the plastic bag and staple it, sealing the bag.
- Allow the mycelium to grow. When it is fully inoculated, you can cut slits into the bag for the mushrooms to grow out of.
- Make sure to spray the opening with a fine mist of water to keep it from drying out. In addition, it is important to have indirect sunlight or artificial light to help stimulate the mushrooms.
How long does it take to grow oyster mushrooms in coffee grounds?
Once the mixture has been made and bagged you can start to see the formulation of mushroom pins as soon as 7-14 days! Oyster mushrooms are a very good beginner mushroom because they are voracious and competitive growers. From the time they start to pin it can be another 1-2 weeks until they can be harvested.
How to harvest and store oyster mushrooms
The way you tell if your mushrooms are ready to harvest is by paying attention to the cap and gills. When the cap starts to tilt up and the gills begin to bulge, it is about time to harvest. These are signs that the mushroom will begin to drop its spores and lose some of its flavors.
When you harvest oyster mushrooms, you should try to grab the base of the cluster and gently twist it off. You can then pull the individual mushrooms apart and bam, they are ready to store or eat!
Fresh
If you have recipes prepared and ready to go, you can forego some of the more technical methods of storing mushrooms and keep them in the fridge. Having fresh mushrooms is such a delight when used within the next 2-3 days.
Dried
Drying mushrooms can also be a good option since the mushrooms can easily be added to soups and rehydrated. They can be easier to store and last longer than fresh mushrooms.
Canned
Canning mushrooms can help them last for years, allowing you to enjoy your mushrooms when you’re ready. The main drawback is that the canning process is more difficult than the other two methods mentioned.
Final thoughts
Oyster mushrooms are not picky eaters. They will devour wood shavings, wheat straw, paper compost, and even coffee grounds. This is a great method for beginners since it can help cut out the need to pasteurize your substrate and make use of community waste. Go ahead and try it out!
